
05:34
Jul 3, 2022
0
0
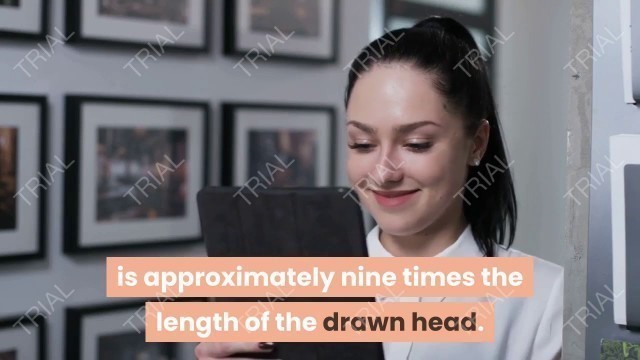
'What Is a Croquis? Learn How to Draw Croquis With Detailed Step-by-Step Guide. Long before a piece of couture makes its runway debut, the design begins in a fashion sketchbook. Fashion sketching propels a designer’s ideas from page to creation. The first step in this process is called a “croquis”—a quick sketch of a human body that serves as the template for a piece of clothing or outfit. What Is Croquis in Fashion? Croquis means “sketch” in French. In the world of fashion design, a croquis is a quick sketch of a fashion figure. The word can also refer to the practice of drawing live models. Croquis drawings are minimalist in style and serve as a blank canvas for drawing clothing. What Is Included in a Croquis Sketch? Fashion croquis sketches are less about the figure drawing and more about the garment. For example, these sketches usually do not include detailed faces, feet, or hands. Fashion illustrations can be added to a croquis drawing to convey texture, color, and accessories after the design concept is solidified. What Is the Purpose of Croquis Drawings? Croquis sketches outline the technical elements of a garment, including. Fit, Shape, Sleeve length, Overall length, Placement of darts and seams. These detailed fashion sketches communicate the design to patternmakers, who can then create a prototype from the croquis. A croquis template can also be used as a blueprint for different designs within a collection of clothing. For example, fashion designer Marc Jacobs uses the same croquis template throughout a season to give patternmakers a sense of how different garments are supposed to be structured for a specific silhouette. This continuity between croquis sketches helps patternmakers to understand the width, height, and shape of garments in comparison to one another. Tips for Creating Croquis Drawings Croquis drawings are the first step in bringing fashion creations to life. If it’s your first time putting a garment on paper, try crafting the croquis on a pre-made fashion croquis template. However, if you want to sketch your own croquis, here are some things to remember: The best tools for creating croquis drawings are a thick piece of paper and a hard lead pencil. Before putting pencil to paper, create a mood board to conceptualize your ideas. Use magazines, photographs, and images of street styles to build separate boards for fabrics, colors, textures, and accessories. Remember that body proportions for croquis drawings are disproportionate to the human body. Legs are elongated to exaggerate height. The standard length of croquis figure, from top to bottom, is approximately nine times the length of the drawn head. Croquis drawings can be posed in different ways to better convey the movement of a design and to best showcase the garment. For example, one hand resting on the hip with the pelvic area tilted, or legs standing wider apart to better show off the design of a skirt. How To Draw a Croquis in 6 Steps. The first step in drawing a croquis is to mark the center balance line for the figure. You will need to separate an 8.5x11-inch piece of paper into nine equal sections. This is known as the standard “nine head” length of a croquis. You can draw horizontal lines for the nine points, approximately an inch and one-eighth each, as a marker for the different sections. 1. Draw the balance line. Draw a vertical centerline for the figure’s center of balance. This line will start from the top of the head and extend to the bottom of the figure’s legs. 2. Draw the pelvic area. Just below the middle of the balance line, draw a square to represent the pelvis. This can be tilted to create different poses. 3. Draw torso and shoulders. From the top corners of the pelvic square, draw two lines upward to create the torso. The line should curve inwards at the waist, and extend back out to create the shoulders. The shoulders should be the same width as the pelvic square. 4. Draw neck and head. The neck should be one-third of the shoulder width, and half the length of the head. Draw a circle for the head in proportion to the body. 5. Draw legs. The figure’s legs should be approximately four times the length of the head created. The legs are portioned into two sections: the thighs and the calves. The top of the thighs should span the same length as the head. Taper the line down to the knee, and again to the ankle so that the ankles are approximately one fourth the size of the head. 6. Draw feet and arms. The feet should be approximately the length of the head and shaped like a triangle. The figure’s arms should be a little longer than they are in real life. Create the arms with tapered lines to the elbow and then again to the wrist. Finish with hands and fingers. READ MORE https://wowfashiontips.blogspot.com/ This channel made articles based on www.wikihow.com DW Documentary, Shea Whitney, Kristino Olsen, Teachingmensfashion, Glamour'
Tags: GLAMOUR , Teachingmensfashion , DW Documentary , shea whitney , Kristino Olsen
See also:


comments